How to use epoxy resin: a guide for beginners!
Epoxy resin is a great product that offers a ‘liquid glass look’ to timber. It is commonly used for bars and table tops. The epoxy resin product we recommend is liquid glass by Norglass Paints as it is Australian made. Once you understand how to use epoxy resin, you’ll be crafting unique pieces of furniture, homewares, trinkets or gifts in no time!
Traditionally epoxy resin is used to fill surface imperfections in timber, such as knot holes and cracks. Because it can be applied in a thick layer, it makes it ideal for filling. However, more people are beginning to use epoxy resin in artistic forms to create river designs for tables, platter boards and more.
In this article we’ll break down the basics of how to use epoxy resin.

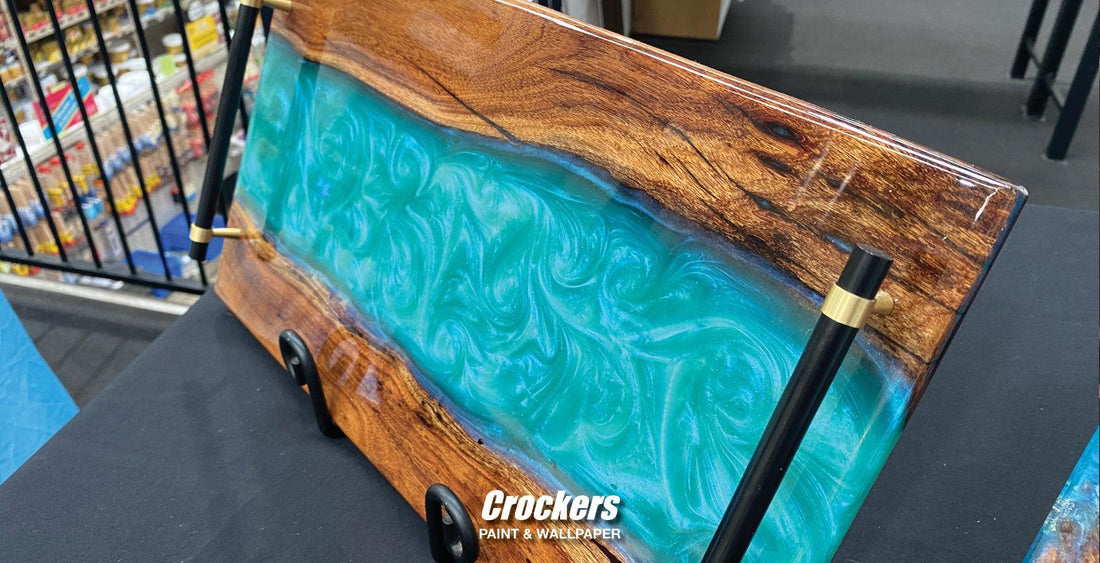
Liquid Glass River Platter Board
STEP ONE: PREPARATION FOR EPOXY RESIN
The first step in how to use epoxy resin is preparation. You’ll need to apply a thin layer of liquid glass with a brush or roller to act as a sealing coat. This coat should be left on for a minimum of 24 hours and then lightly sanded with 240 - 300 non-clogging sandpaper.
Next we suggest that you clean the area with Norclean, a premium blend surface cleaner that will remove all dirt and residue.
STEP TWO: MIXING RATIO FOR EPOXY RESIN
When mixing epoxy resin it is important to get the ratios right - if you don’t the liquid glass will not cure properly. Norglass epoxy resin base comes in one litre and the hardener in 500 millilitres.
Before mixing, if you’re wanting to add colour to your resin project now is the time to do so. Norglass offers two great products to add a funky twist to your art piece, colourant and metallic powder. Both of these need to be added to the base before the hardener. The amount required depends on the colour you’re wishing to achieve. It is important to note that once the hardener is added, the colour intensity will be diluted.
The standard ratio for mixing liquid glass is two parts epoxy resin base to one part epoxy hardener. We recommend starting with a smaller piece of work before attempting a major liquid glass piece.
To start with measure 100ml of the base with 50ml of the hardener into a clean round container. Stir until the product becomes clear and there are no signs of streaking. If there are any areas that aren’t integrated they will not cure. Stir for about three to four minutes.
STEP THREE: THE WAITING GAME
When working with liquid glass, patience is required in order to get the best results. After the base and hardener are mixed together, you need to wait out the minimum induction time which is dependent on the amount of liquid glass you’re working with. The below times should be observed:
- 100 - 200ml wait 30 minutes
- 200 - 750ml wait 15 Minutes
- 750ml or greater wait 10 minutes.
These wait times are based on a working temperature of about 20 to 15 degrees celsius. Avoid working in high humidity because epoxy resin creates an exothermic reaction, meaning that the resin will slowly generate its own heat to cure. If your workspace is too warm, the curing process will be accelerated which can lead to overheating of the resin and potential failure of your project.
STEP FOUR: LET THE LIQUID GLASS FUN BEGIN!
The first three steps in this process are vital to get across if you want to learn how to use epoxy resin properly. Most people think they can jump in at step four and be left with a masterpiece. However, we hope that you can appreciate the delicacy of working with epoxy resin and why it is so important that correct measures are taken.
Now it’s time to determine how much liquid glass you need for your project. If you want to test out your resin skills before you start your project, you can purchase a ready-made timber resin mould from Crockers.
As a general rule of thumb, one mixed litre of epoxy resin equals 1000 cubic centimetres. Therefore one square metre at 1mm thick will require one litre.

Liquid Glass Mini River Table in Progress
Apply tape to the entire perimeter of your surface leaving it several millimetres above the table or bench top. If there are any knot holes or cracks, apply tape underneath to prevent the resin running through. There are no solvents in liquid glass epoxy resin which means that it will not stick to the tape.
Once all tape is in place, pour the calculated volume onto the surface and spread around lightly with a squeegee and then allow it to self-level. If bubbles appear, use a heat gun on a warm setting and gently wave it over the surface at a distance of approximately 30 centimetres until the bubbles disappear.
Leave the pour overnight or 24 hours to cure.
STEP FIVE: ADDING THE FINISHING TOUCHES
While you could technically leave the liquid glass as is, we recommend that after the tape has been removed, a light sand with 400 grit clog free sandpaper will finish the piece off nicely.
Once sanded, wipe down the bench or table top with Norclean and then finally apply a coat of Northane. Once Northane is cured (48 hours) your bench or tabletop will now be waterproof, stain proof and food safe.
HOW TO USE EPOXY RESIN FOR YOUR OWN DIY PROJECT
So there you have it! A five step process on how to use epoxy resin. We hope this article has made you feel more comfortable working with liquid glass.
We hold Liquid Glass Workshops! Click here to see when the next one will be!


